TurtleNet 3: ZeroTier and Private Networking
Before we can properly offer services on our VMs, we'll need to make sure they are accessible over the Internet!
However, simply exposing the entire server to the Internet (via portforwarding or otherwise) is extremely dangerous, since it allows anyone from anywhere in the world to connect to your private services, like the Proxmox console. Even with proper security measures and strong passwords, it's impossible to guarantee that malicious actors won't be able to find an exploit and steal your private information!
As a solution, let's be careful to separate network access to public services, which anyone can interact with, and private services, which only you and authorized users can access.
In this section, we'll set up our private network.
Introducing ZeroTier
Without any further configuration, everything is private by default: in order to access the Proxmox web console, you'll need to be on the same network as your server at all times. It's also very difficult to access VMs from other devices as well, since they're networked internally within Proxmox itself.
Let's first build up our private access, such that you and others can access server resources even when you're not physically next to the server.
As I explained in Part 1, there are many alternatives to ZeroTier that achieve similar things through slightly different protocols, like WireGuard or Teleport. You are welcome to choose what works best for your use case, but for now I'll use ZeroTier as an example of how a private networking setup might look like.
How does ZeroTier actually work?
ZeroTier essentially creates a virtual, software-defined network that you can add devices to. Regardless of what physical networks or locations those devices are in, they'll all be connected to the same ZeroTier network, allowing them to access one another as if they were in a LAN setup.
The technical details of how this is possible without portforwarding is beyond the scope of this guide, but you're welcome to read their whitepapers and explore UDP holepunching to learn more and confirm that it's secure.
ZeroTier Setup
First, you'll need a ZeroTier account, which you can make on the website here.
Once you have an account, you can create a network. You'll want this network to be private, such that you'll have to manually validate each device that requests to join.
Joining the ZeroTier Network from an external device
As a warm-up to VM configuration, let's see how the joining process looks like using an external computer or phone.
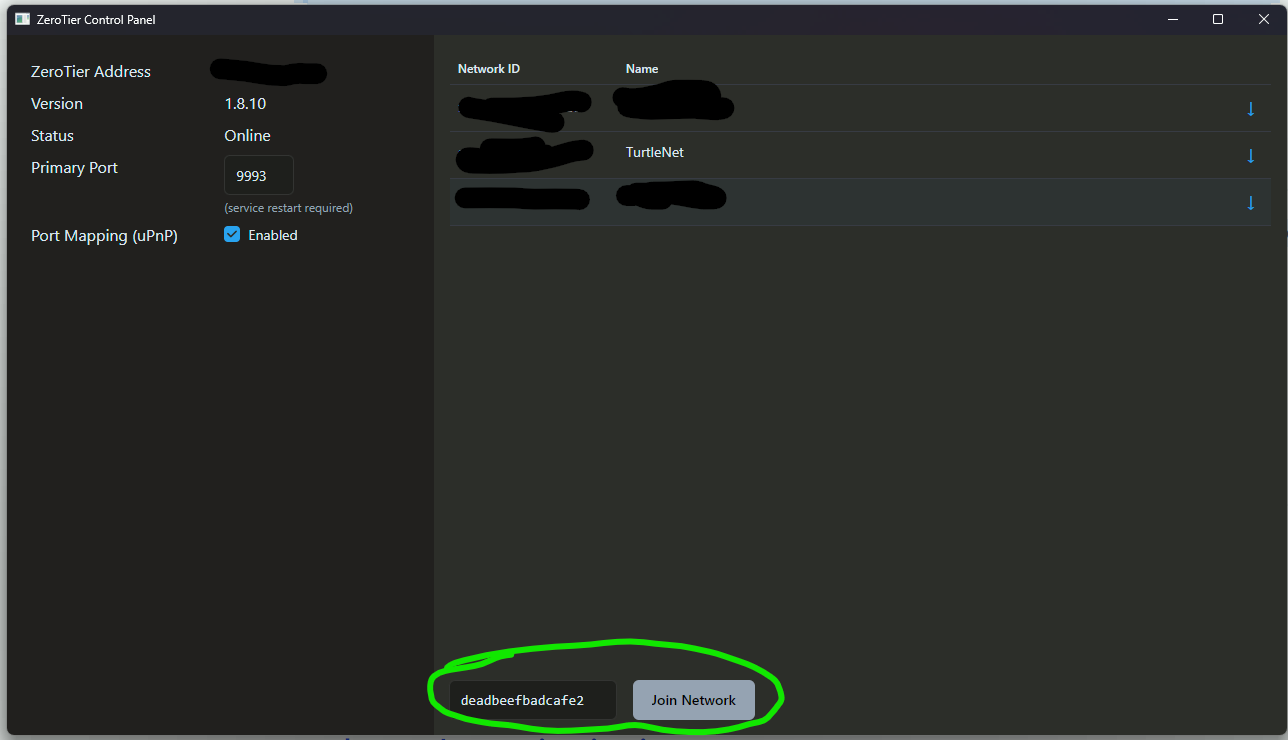
First, download the correct ZeroTier distribution for your device here. Then, you should be able to join the network by entering in the network ID into the GUI like so:
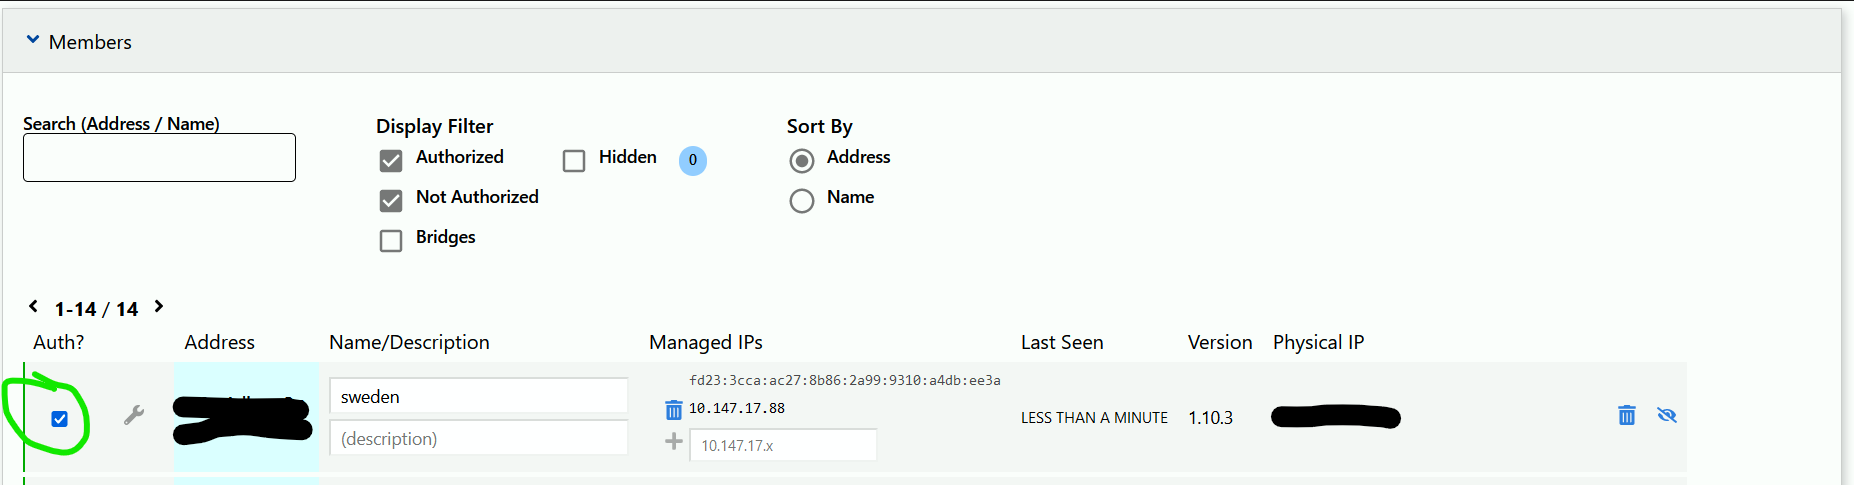
You'll notice that the device doesn't immediately join. You will need to go to the ZeroTier website and check the box next to the new device that pops up. You should give this device a name and description so you can remember it later.
You'll also see that the device is assigned an IP address in the ZeroTier website. This will be important to note down when we do this process for the VM.
Joining the ZeroTier Network from your VM
Now, let's do the same thing from with your VM!
The process is pretty similar, only we don't have a GUI anymore. Instead, you can do the following:
Open the Proxmox web console, and navigate to the live console instance for your VM.
Run the command
curl -shttps://install.zerotier.com| sudo bashto install the ZeroTier command line interface.Run the command
sudo zerotier-cli join <NETWORKID>, replacing<NETWORKID>with your actual network ID.The terminal should now signal that the join was successful. Don't forget to check the box next to the new device in the ZeroTier website, and note down the new IP address!
Joining the ZeroTier Network from Proxmox
Doing this is exactly the same process as joining ZeroTier from your VM, except now you should go through the steps in the Proxmox shell rather than your VM's console. After you assign your Proxmox instance to a domain name, you should now be able to access your Proxmox console using https://node.domain.tld:8006 in your web browser. For example, my server is named turtle and my domain is bencuan.me, so I could type https://turtle.bencuan.me:8006.
Domain Configuration
Now that ZeroTier has been configured on both your VM and your regular device, let's make it easier to access!
In Part 2, you should have acquired a domain. If you did not do this and opted to have a local domain instead, skip to "Local Resolution".
Your domain provider should have an option to set DNS records in their web console. If they don't, or you don't trust your provider, you can also link an external provider like Cloudflare, then continue with this process.
In your DNS configuration, let's add a new record corresponding to your VM.
Create a new A record. (You can also create an AAAA record if you prefer to use IPv6).
For the name, use your VM's hostname (ex.
arabia).For the IP, enter the ZeroTier IP corresponding to your VM (found in the ZeroTier web console).
If using Cloudflare or a similar service, disable the option to proxy the record.
Save the new record, and wait a couple minutes for it to propagate.
Now, you should be able to reach your domain using your new record! As an example, I have a VM named arabia and my domain is bencuan.me. Thus, if I type in the command ping arabia.bencuan.me on my laptop, I should be able to reach it and get the following output:
❯ ping sweden.bencuan.me

Pinging arabia.bencuan.me [172.24.220.210] with 32 bytes of data:
Reply from 172.24.220.210: bytes=32 time=26ms TTL=64
Reply from 172.24.220.210: bytes=32 time=29ms TTL=64
Reply from 172.24.220.210: bytes=32 time=32ms TTL=64
Reply from 172.24.220.210: bytes=32 time=23ms TTL=64

Ping statistics for 172.24.220.210:
    Packets: Sent = 4, Received = 4, Lost = 0 (0% loss),
Approximate round trip times in milli-seconds:
    Minimum = 23ms, Maximum = 32ms, Average = 27ms
If you tried to ping arabia.bencuan.me right now though, it will most likely result in a timeout since you haven't been added to my ZeroTier network!
Local Resolution
If you didn't acquire a public domain, you'll still have to use your IP addresses to access your VM's. We'll see how we can set up a custom DNS server to get around this in a future step.
SSH
Depending on your distribution, SSH may or may not be enabled by default in your VM. If it is, you should now be able to run ssh vmname.domain.tld (replacing with your actual VM name and domain, of course) and connect to your VM from your other devices.
If this is not the case, you may need to install it and/or enable it manually. This is how to do so for Ubuntu/Debian-based systems (look up how to do it on your OS of choice if this does not apply):
Run
sudo apt install sshRun
sudo systemctl enable ssh.service --now
To save time for future logins, you can set up public key authentication so that you don't have to type in your password every time you SSH into your VM. (This is only available for Linux-based VM's.)
On your personal device, run
ssh-keygenif you haven't done so before.Run
ssh-copy-id <username@vm.domain.tld>, replacing the part in brackets with your actual VM user and address.Type in your VM's user password once.
Remote Desktop
If you're using Windows or another OS with a graphical interface, you can access the GUI through Proxmox's default console view. However, you might have noticed that this console can be extremely laggy or unresponsive at times.
If you will need to access your VM graphically for things like gaming or video editing, you should set up some sort of remote desktop service.
For Windows and Mac VM's, I highly recommend Parsec- it's given the best latency/responsiveness out of all the remote desktop applications I've tried so far.
For easiest access to Windows VM's, you can alternatively use the built-in Windows Remote Desktop. A client is automatically installed on all Windows devices, so you don't need to install any additional software to access it. (Note that a Windows Pro VM is required.)
For Linux VM's, you can use the VNC protocol. There are many clients for this: see here for a guide on how to configure VNC.
Summary
If you've gotten this far, you should now be able to access your VM from anywhere, but only on your personal devices! This will allow you to access server resources such as the Proxmox console even if you're not connected to the same network as your server.
Next, we'll take advantage of our private ZeroTier network to set up a reverse proxy to access internal services in a convenient manner.